Remote Desktop • Knowledge Base
Remote Desktop Session Host Configuration
Follow these steps to configure Remote Desktop licensing on Windows Server and apply the policy through PowerShell.
Guide
Configure the licensing settings
Complete the steps below in order. The screenshots can be opened at full size, and the final policy update confirms that the Remote Desktop Session Host configuration has completed successfully.
-
1
Open the Local Group Policy Editor
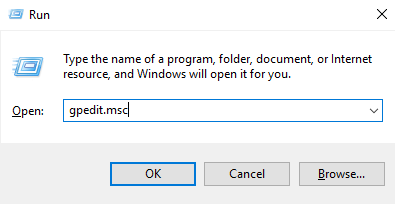
Press Win + R and enter
gpedit.mscto open the Local Group Policy Editor.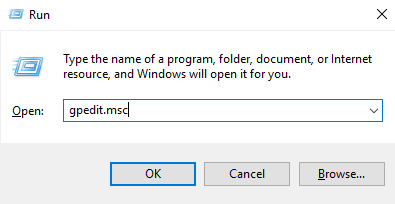
Open the Group Policy Editor from the Run dialog. -
2
Open the Remote Desktop licensing policy
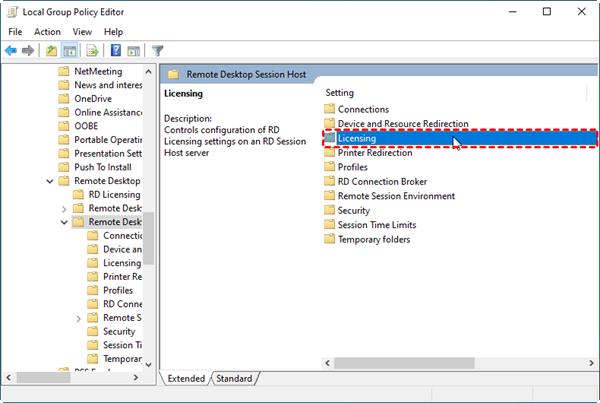
Select Computer Configuration > Administrative Templates > Windows Components > Remote Desktop Services > Remote Desktop Session Host, and double-click Licensing from the right pane.
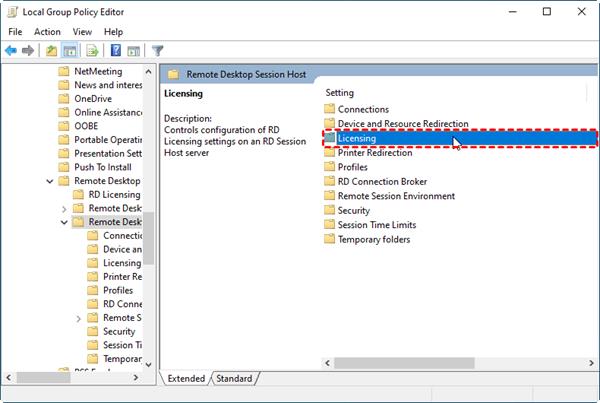
Open the Licensing policy under Remote Desktop Session Host. -
3
Select the license servers policy
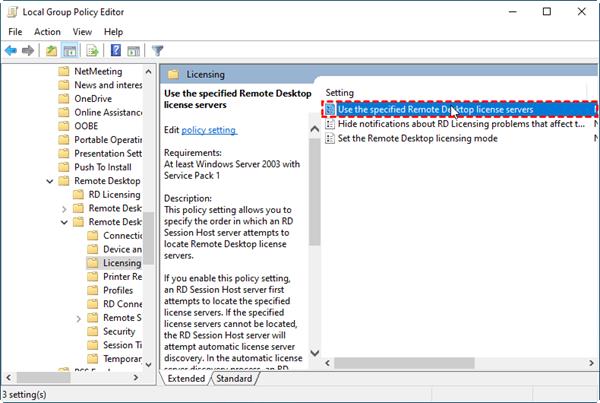
Locate and double-click Use the specified Remote Desktop license servers.
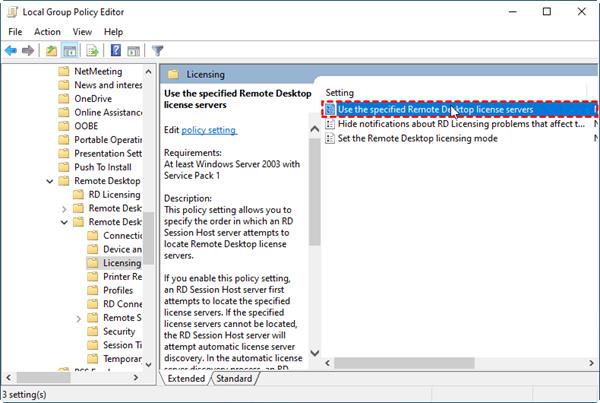
Open the policy used to specify the license servers. -
4
Enter the license server address
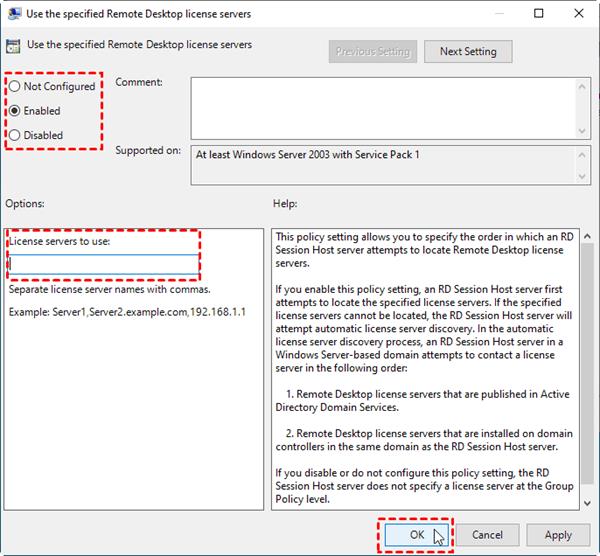
Tick Enabled. Enter the server IP address in License servers to use. Then click Apply > OK.
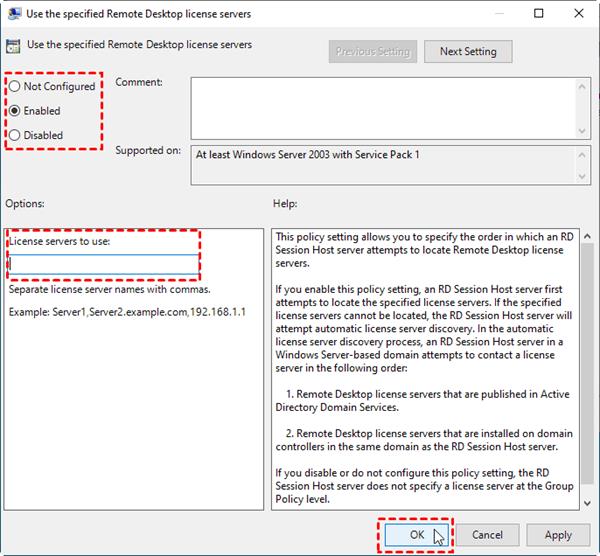
Enable the policy and enter the license server IP address. -
5
Set the licensing mode
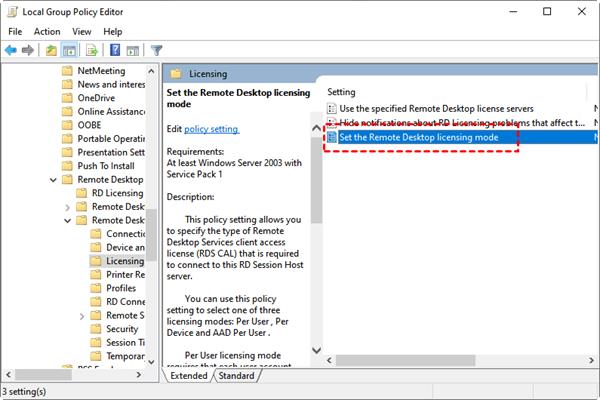
Return to the Licensing setting and click Set the Remote Desktop licensing mode.
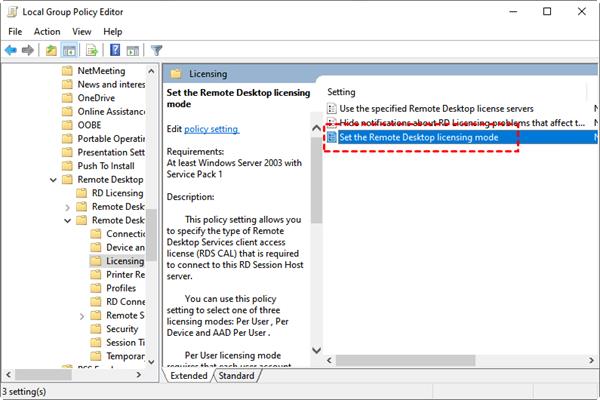
Open the licensing mode policy. -
6
Choose per-user or per-device licensing
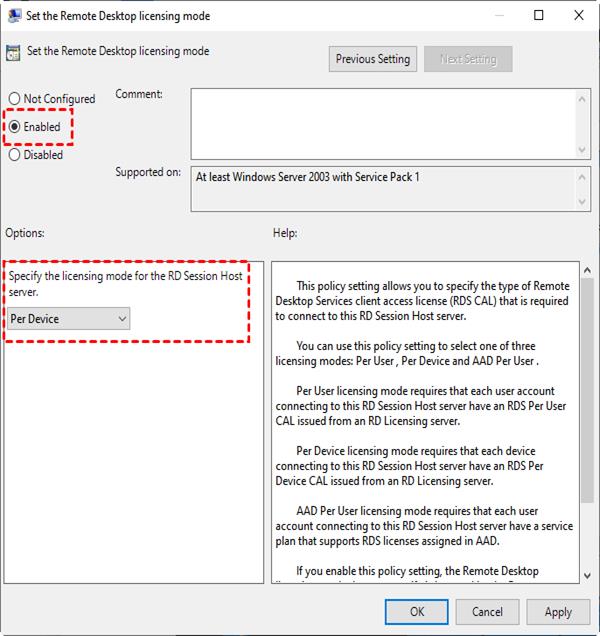
Tick Enabled. Under Options, select Per User/Per device according to your operating system. Then click Apply > OK.
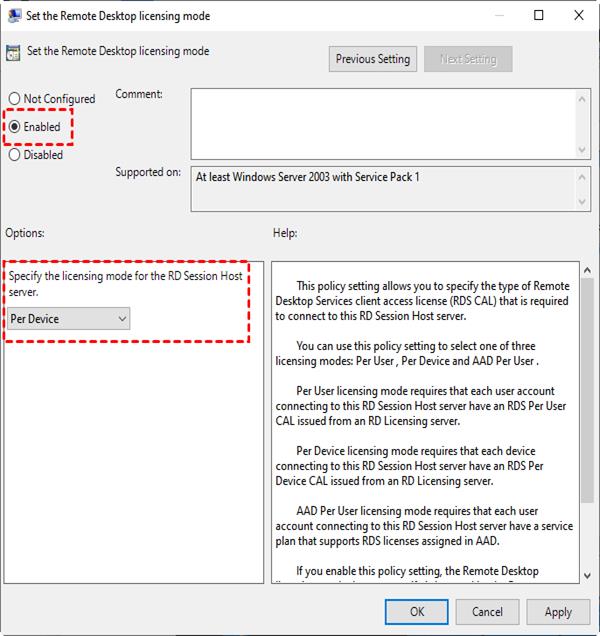
Choose the licensing mode that matches the server environment. -
7
Open PowerShell as administrator
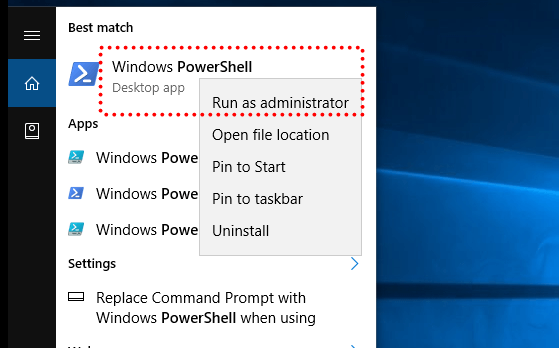
Close all open windows, search for PowerShell in the Start menu, and select Run as administrator.
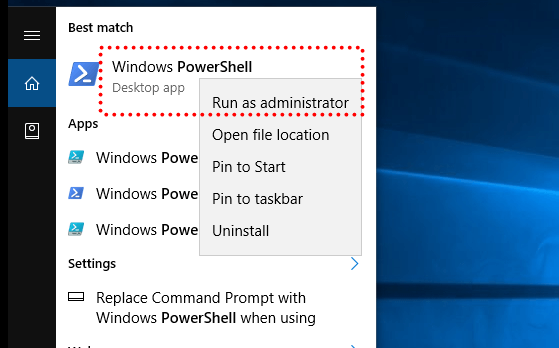
Open an elevated PowerShell window. -
8
Apply the policy update
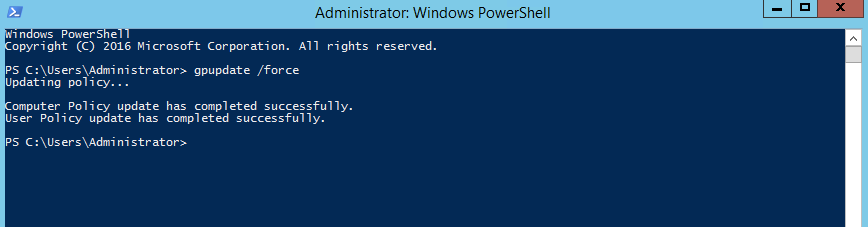
Enter the command below. The Remote Desktop Session Host configuration completes when you see the message
Computer Policy update has completed successfully.
gpupdate /force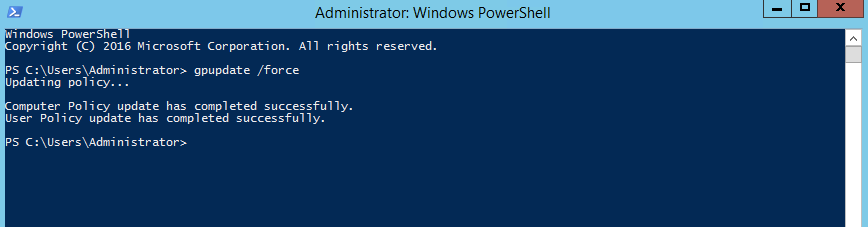
Confirm that the computer policy update completed successfully.